How to create a pipeline?
Pipelines help you organize your recruitment process into stages and track candidates as they move through the hiring process.
You can create different pipelines for different recruitment workflows and select the appropriate pipeline when creating a job posting.

Creating a Pipeline
To create a new pipeline:
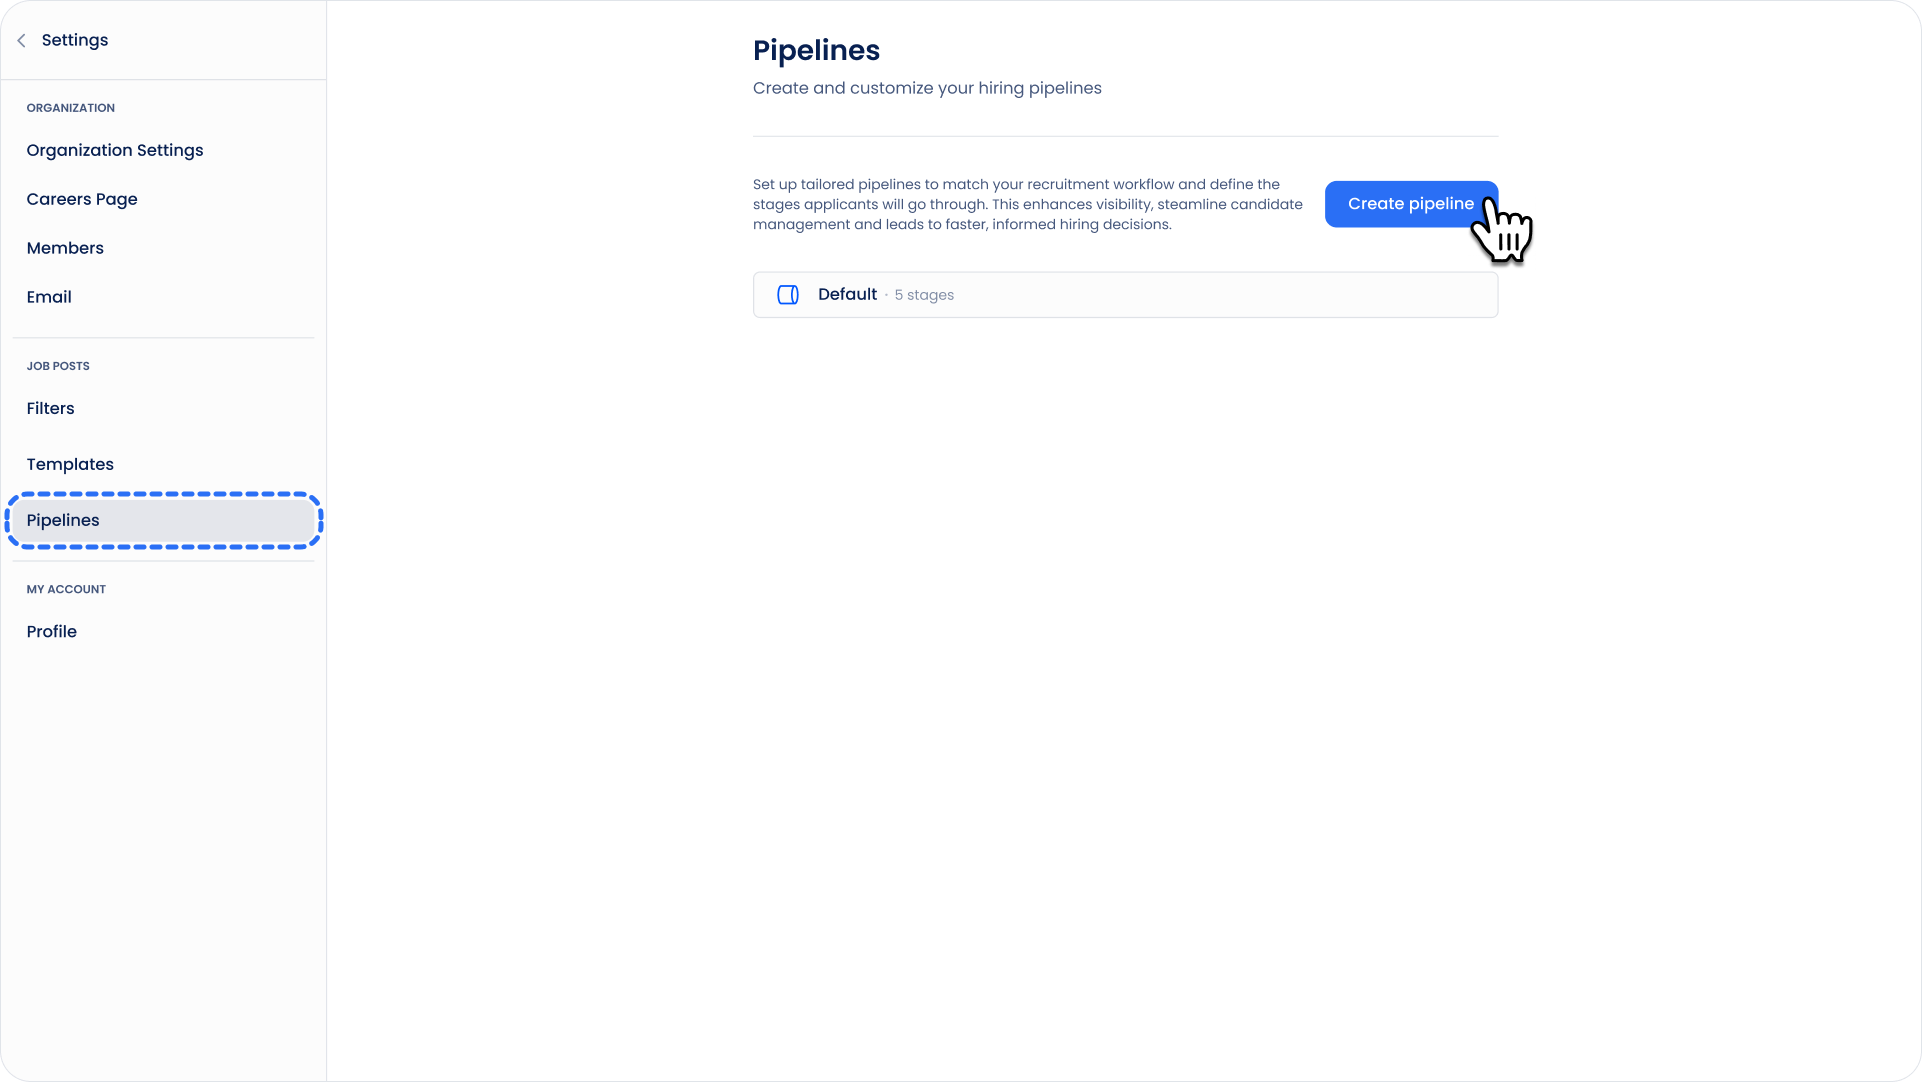
- Go to Settings → Pipelines.
- Click Create Pipeline.
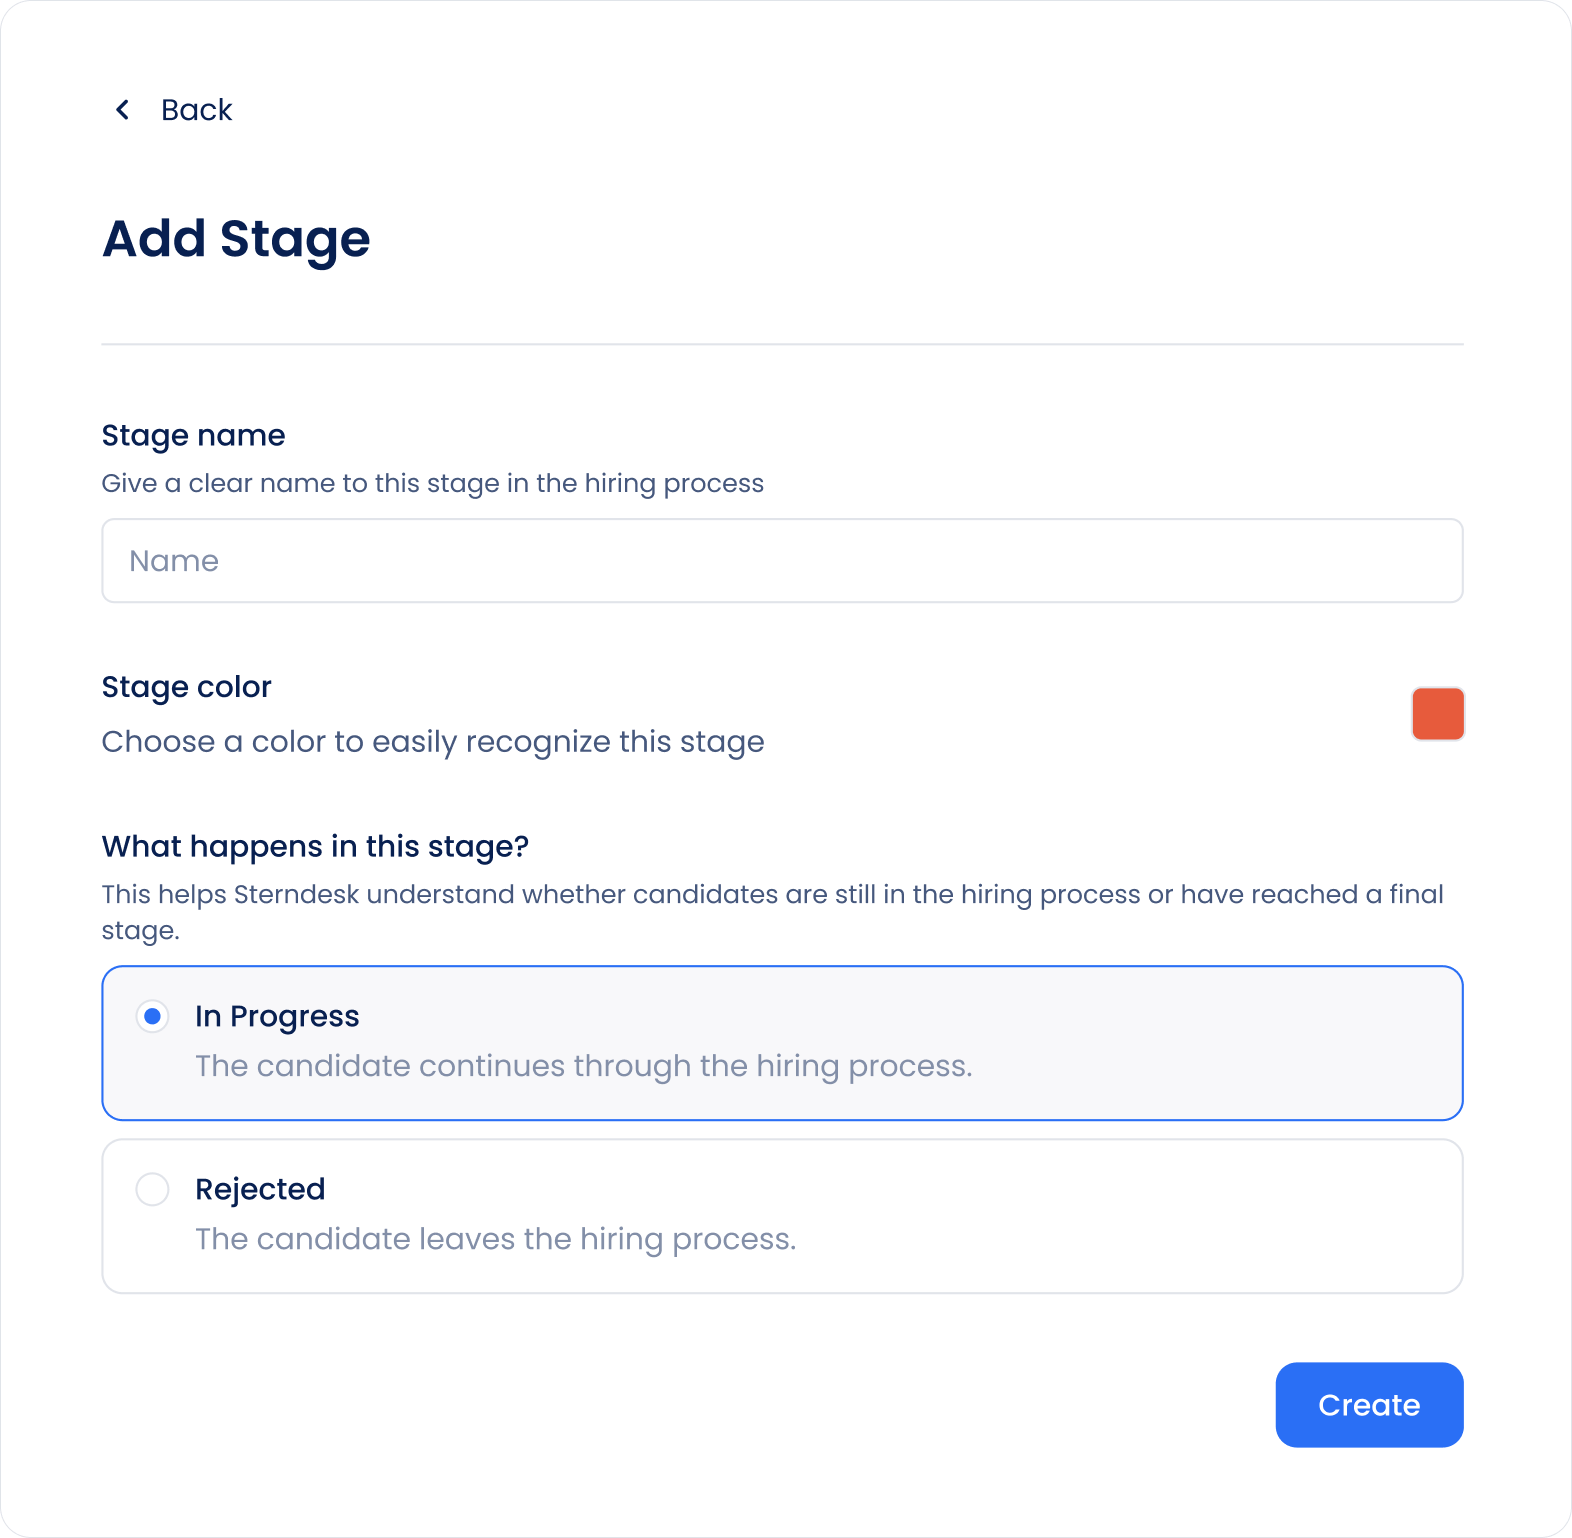
- Enter a name for your pipeline.
- Add the stages you need for your recruitment process.
- Save the pipeline.
Adding Stages to a Pipeline
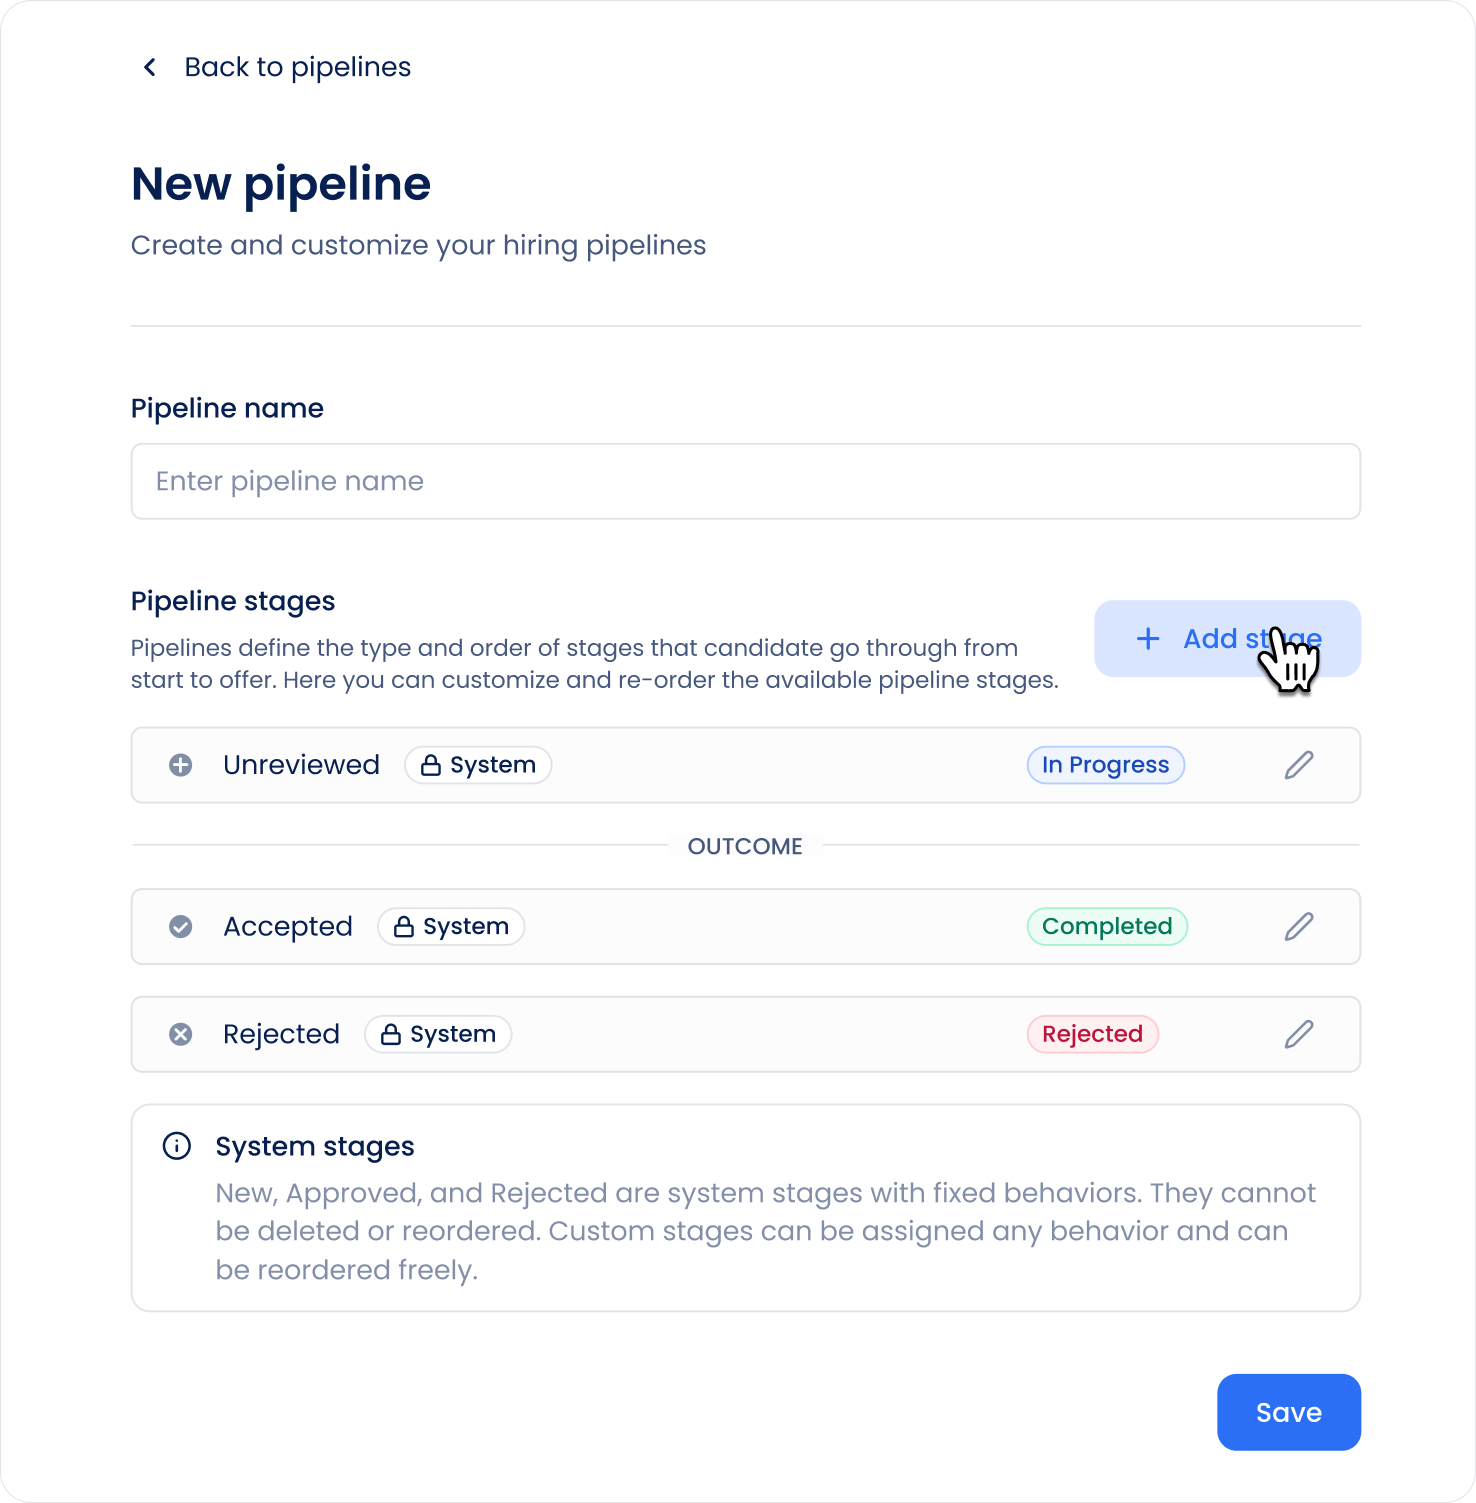
Every pipeline includes the default system stages. You can add custom stages to reflect your recruitment process, such as Phone Interview, Client Review, or Rejected by Client.
To add a custom stage:
- Click Add Stage.
- Enter a name for the stage.
- Select the Candidate status:
- In Progress — the candidate is still moving through the hiring process.
- Rejected — the candidate is no longer part of the hiring process.
- Choose a color for the stage.
- Save the stage.
What Is Candidate Status?
Candidate status tells Sterndesk whether a candidate is still part of the hiring process when they enter a custom stage.
In Progress
Use In Progress when the candidate is still being considered for the position.
For example:
- Phone Interview
- Technical Interview
- Client Review
Rejected
Use Rejected when entering the stage means that the candidate has left the hiring process.
For example:
- Rejected by Client
- Failed Interview
- Not Suitable
This allows you to have multiple rejection stages while Sterndesk still understands which candidates are actively moving through the hiring process.
Reordering Stages
You can change the order of custom stages to match your recruitment process.
Use the drag handle next to a stage and drag it to the desired position.
The stage order and candidate status are independent. For example, changing a stage from In Progress to Rejected does not move the stage to another position.
Editing a Stage
To update an existing custom stage:
- Open the stage settings.
- Change the stage name, color, or Candidate status.
- Save your changes.
The updated settings will apply to the stage in the pipeline.
Using Your Pipeline
When creating a job posting, select the pipeline you want to use for that vacancy.
When candidates apply or are manually added to the job posting, their applications are added to the pipeline and can be moved between stages as the recruitment process progresses.
Important: Once a job posting has applications in its pipeline, you cannot switch that job posting to a different pipeline.
Learn more about working with candidates in pipelines in How to Use Pipelines?
Important to Know
Pipeline stages and candidate statuses are used to track the recruitment process inside Sterndesk.
Moving a candidate to a Rejected stage marks them as no longer part of the active hiring process, but does not automatically send a rejection email to the candidate.
If you want to inform the candidate about the decision, you need to send the communication separately.
Can't find what you're
looking for?